Friday, June 29, 2012

y'all ready for a little weekend sewing?


i am.  i've prewashed, ironed, and folded a lot of fabric the last couple days and have plans to get some projects started (and hopefully finished.)  these are the fabrics to make skirts for my girlies.


and these....


...a bag to start with and then so much more!
  

Thursday, June 28, 2012

cupcake challenge ::: week 14 ~ 4th of july


i bet y'all saw this one coming seeing as how the 4th of july is next wednesday.  we are making plans and getting ready to celebrate independence day; including parade floats, costumes, delicious food, and yummy treats.  there are even a couple practical jokes i'm hearing bits and pieces of in hushed voices.

i used swiss chocolate boxed cake mix, vanilla butter cream frosting, red and blue sprinkles and sparkly gel tubes. 


i had a house full of teenagers helping me with cupcakes this afternoon and they came up with interesting cupcakes of their own.  


they found some red and blue frosting in the freezer and the spray dye from the flag day cupcakes.  add those to the toppings that i got out and they got to decorating.  it was so much fun seeing their creative sides come out and play.

Tuesday, June 26, 2012

i'll have one of everything bag


i know i've mentioned that i hoard collect yarn.  well, i also 'collect' fabric, craft books, and patterns.  there's a line of fabric i'm wanting but need to make some room for it.  it comes out in august so i've got to get going on stashbusting.  last night i was looking through my stash and came across these fat quarters.


and decided they needed to become this bag.


want a closer look?


it's in the book seams to me 24 new reasons to love sewing by anna maria horner.  i made a couple alterations like pockets on the outside and inside. also i didn't add the tasseles.


i gotta find my next project and make room in my stash for new fabric.  maybe another i'll have one of everything bag in next stop - london.

Friday, June 22, 2012

cupcake challenge ::: week 13 ~ summertime


when i was a little my mom would make us ice cream cone cupcakes for a fun treat.  and fun is what summer is supposed to be about.  y'all will need a box of 24 ice cream cones with flat bottoms, your favorite cupcake batter, frosting and toppings.


i mixed up a box cake mix according to the package. 


then using an ice cream scoop placed a scoop of batter in each ice cream cone. y'all could use a spoon but an ice cream scoop is so much more fun!


i used a mini-muffin tin to hold the cones and my toaster oven to bake them.  i heated the oven up to 350*f then turned it down to 325*f and baked the cupcakes for about 24 minutes.


this is what they look like when baked.


i mixed up a batch of vanilla butter cream frosting and frosted the cupcakes using the wilton #12 decorating tip. then drizzled on magic shell and topped with sprinkles.

Thursday, June 21, 2012

cupcake challenge ::: week 13


last night was the summer solstice and we are already in full summer mode here; pool, park, beach, free bowling ( here is where we go if you are local), dollar movies, sleepovers, museums, camp outs, summer classes, video game tournaments, gardening, summer reading..... the list goes on.

with all that is going on i kinda dropped the ball on this weeks cupcake challenge, sorry!  i am baking my cupcakes as i type.  i promise sometime today between visiting friends, swimming, an order of the arrow meeting and bbq and bowling (my Littles think we can squeeze it in....i'm not so sure) i will get my cupcakes frosted and posted.  humm... looking at our to do list.... in the morning...maybe. i'm still going to try for today.

i'll let all y'all know the theme not to mess y'all's schedule (JCub) up too much.  week 13 ~ summertime

i hope all y'all enjoy the first full day of summer, stay cool, and drink LOTS of water. it's going to be HOT (95 already here)

Friday, June 15, 2012

origami tissue holder


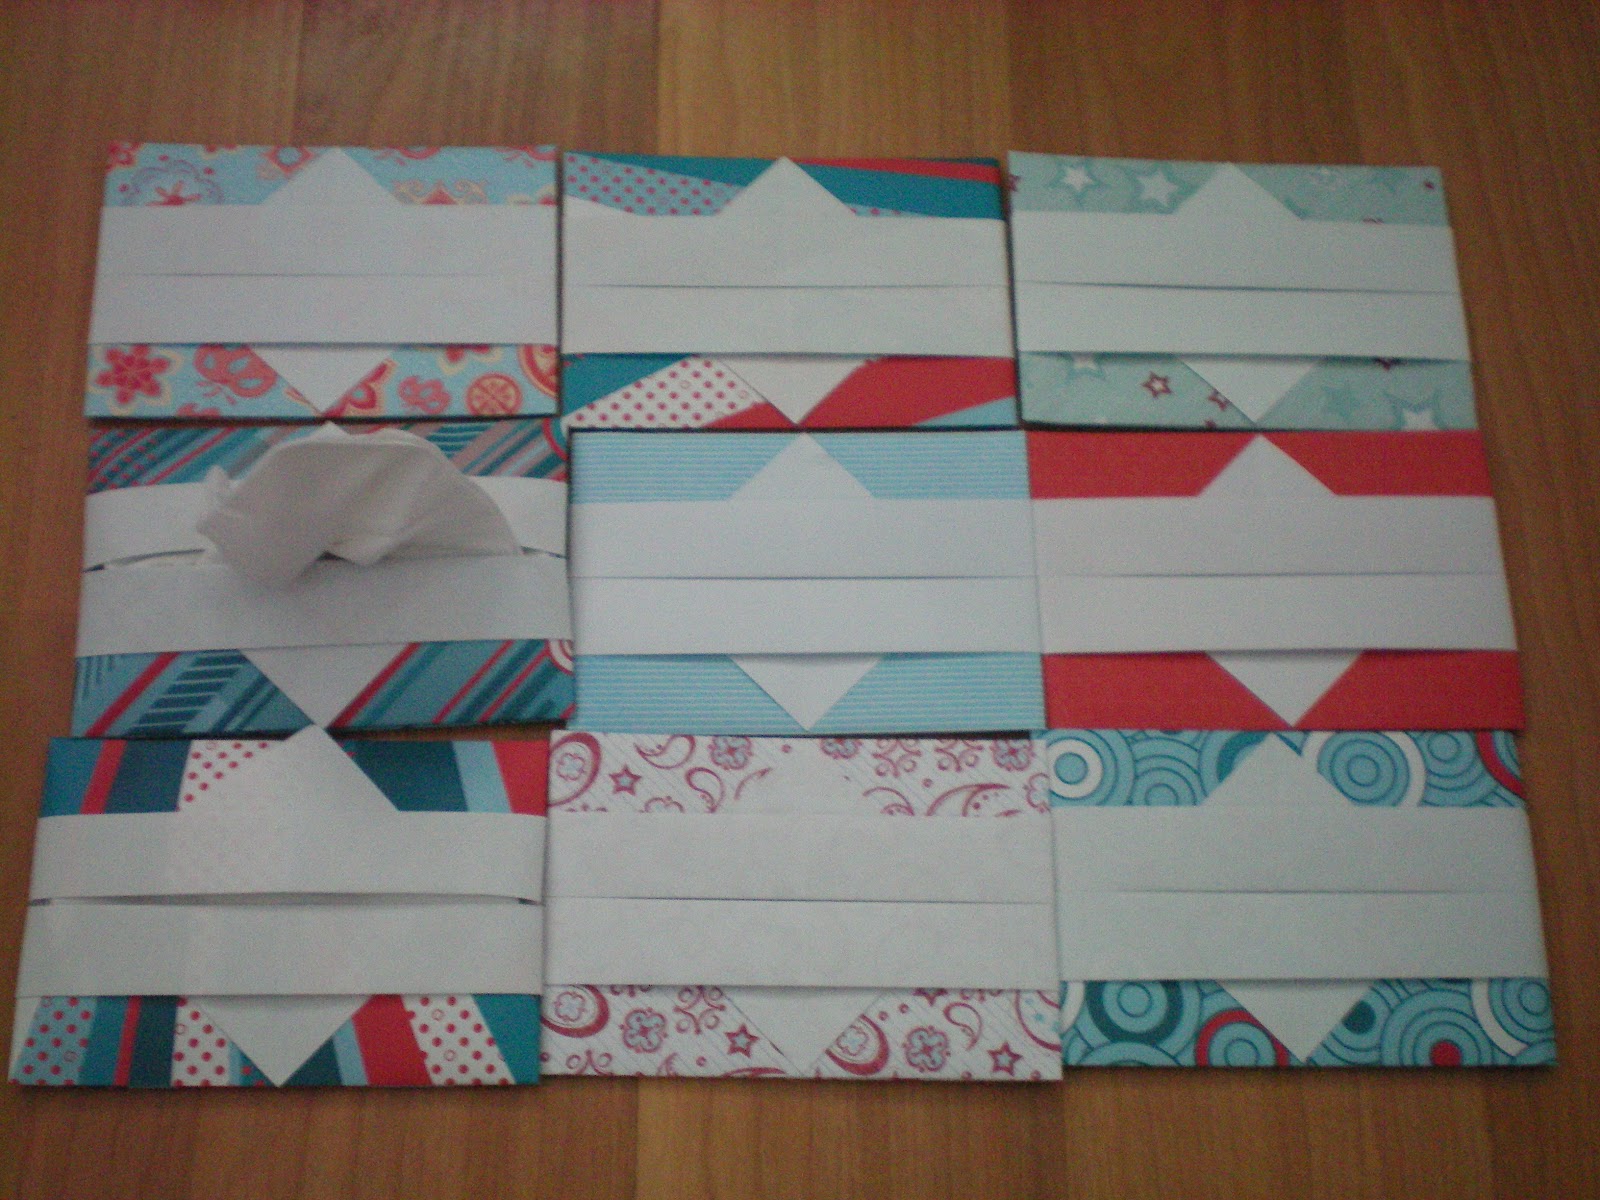
this paper tissue holder can hold 2 or 3 tissues.  i use them because i like to go light on the things i carry around with me. i don't use the whole plastic pouch of tissues before it gets destroyed.  so i feel like i'm wasting them.  it also has a higher cute factor then the plastic pouch of tissues.


start with a piece of 9x9 craft paper.  i cut mine down from a 12x12 piece.


fold it in half making a triangle


open it up


fold it in half again and open it up. y'all should have an X folded in the paper.


fold the corners into the center


now open it all back up


fold a corner to the line made in the last step.


open it up


fold the opposite corner to the same fold line


fold the corner back to the edge


fold the center edge in.  take it slow there is a hidden fold line on the colorful part of the paper there. use that as a guide.


now fold the opposite corner the same way


flip it over


fold one side in


if you flip it back over it should look like this


fold the other side in


then tuck one side into the flap of the other


flip it back over, it should look like this


fold it in half along the opening


stuff the tissues in


i like to use a piece 9x9 craft paper.   but we don't always have a piece of craft paper on hand so a standard piece of printer paper will work.  y'all just need it to be a square.

fold one of the long edges over to the other long edge making a triangle shape.


fold the rectangle bit sticking out along the edge of the triangle. then open it up and fold the edge the opposite way to weaken the edge of the rectangle along the side of the triangle.


carefully cut or tear (we don't always have scissors with us) along the edge of the rectangle piece


y'all should have a square piece of paper and a rectangle now.  toss the rectangle or keep it for another project later.  we just want the square right now.

head back to the beginning of this tutorial and follow the steps with the square you made.  the first fold is already done.


it's a little tighter fit to get tissues in then the 9x9 paper. so be careful not to tear the opening.